Views: 222 Author: Edvo Publish Time: 2025-11-18 Origin: Site


Content Menu
● What Are Memory Foam Insoles?
● Benefits of Memory Foam Insoles
● Step-by-Step Guide: How To Make Memory Foam Insoles
>> Adding Fabric or Covering (Optional)
● Cleaning and Maintenance Tips
● Troubleshooting Common Issues
● Creative Ideas for Customization
● Advanced Tips for Professionals and OEMs
● Frequently Asked Questions (FAQs)
>> 1. How thick should my memory foam insole be?
>> 2. Can I use regular foam instead of memory foam?
>> 3. Will memory foam insoles fit all types of shoes?
>> 4. How can I make the insoles more breathable?
>> 5. Can memory foam insoles help with foot pain?
This guide covers every step in crafting high-quality memory foam insoles—from selecting materials and mastering techniques to troubleshooting issues and exploring creative modifications. Throughout, practical advice ensures your project is easy to follow, whether you are new to DIY or an experienced maker.

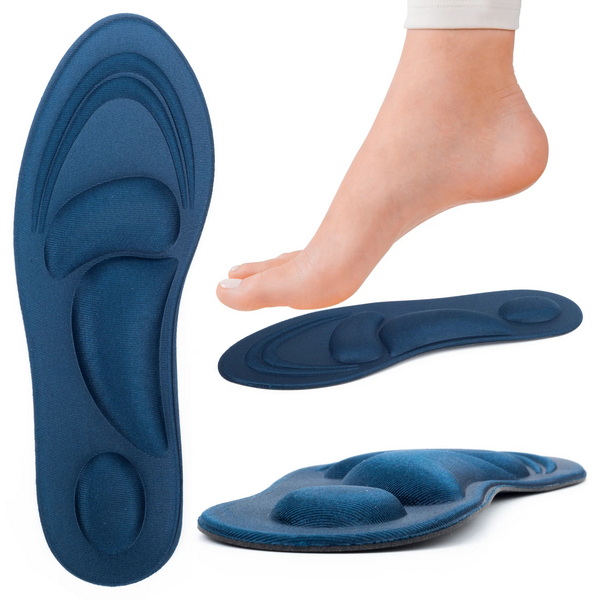
Memory foam insoles are shoe inserts made from viscoelastic polyurethane, designed to provide an ergonomic, cushioned fit for any foot type. Unlike basic foam insoles, memory foam adapts to the heat and pressure of your body, molding precisely to the contours of your feet. This technology originated in orthopedic settings and quickly became a favorite in athletic and everyday footwear, prized for its durability and comfort.
- Pressure distribution for even weight support, reducing strain on the heel, arch, and ball of the foot.
- Shock absorption to minimize impact during walking or running.
- Enhanced comfort that improves the feel of every step.
- Custom fit as the foam adapts to individual foot contours.
- Effective pain relief from common conditions such as plantar fasciitis, flat feet, or discomfort from prolonged standing.
- Added value for specialty footwear, work boots, sports shoes, and orthotic needs.
Start by collecting all essential supplies:
- Memory foam sheets, 5–10mm thick for the best blend of cushioning and fit
- Old insoles for templates, or use a paper tracing of your foot
- Scissors or a precision craft knife
- Marker or pen for tracing outlines
- Measuring tape or ruler
- Clean cloth for prepping surfaces
- Adhesive spray or quick-drying shoe glue (optional for fabric covers)
- Breathable mesh, cotton, or synthetic fabric for an upper cover
- Sandpaper or a nail file to smooth any rough edges
- Double-sided tape or anti-slip material (for better shoe grip)
- Punch tool, needle, or small awl for adding ventilation holes
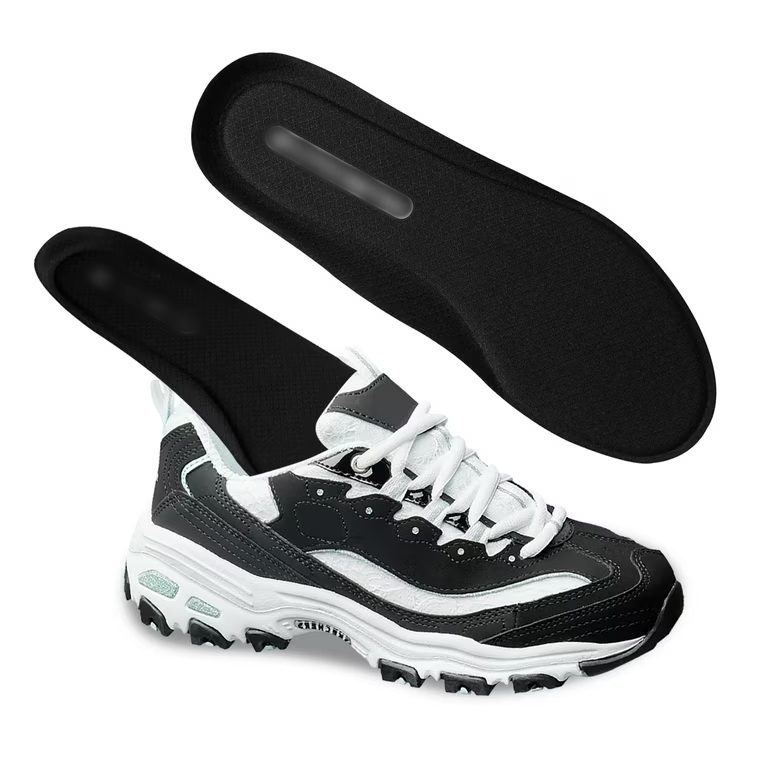
1. Remove a factory insole from your shoe to use as a template, or stand on a piece of paper and trace your foot for a customized fit.
2. Place the template or tracing over the memory foam sheet. Use a pen or marker to create an accurate outline.
3. Double-check the outline against your shoe to confirm it fits comfortably without crowding or sliding.
1. With sharp scissors or a craft knife, carefully cut along the drawn lines. Make steady, controlled cuts for smooth edges.
2. Test the rough-cut foam in your shoe to check sizing; trim as needed for perfect fit.
3. If necessary, cut two identical pieces—one for each shoe.
4. For added arch support, layer additional foam at the instep and secure it with glue.
1. Examine the cut edges for roughness and shape irregularities.
2. Use sandpaper or a nail file to gently smooth all edges for comfort.
3. Try the foam insole in your shoe, walk around, and identify any pressure points. Trim extra foam if you feel discomfort or bulkiness.
1. Select a breathable fabric—such as cotton, mesh, bamboo textile, or specialized shoe cloth—for extra durability and hygiene.
2. Cut the fabric slightly larger than the foam outline.
3. Spray a thin, even layer of adhesive onto the foam, then place the fabric over it, smoothing out any wrinkles.
4. Fold excess fabric underneath the foam and glue securely in place. Trim away stray threads for a professional finish.
5. For premium performance, consider moisture-wicking, antimicrobial, or hypoallergenic fabric layers.
Memory foam insoles are highly versatile. Here are advanced customization options:
- Add heel pads made from high-density foam for extra shock absorption.
- Build up arch support with layered foam or gel inserts.
- Perforate the foam with ventilation holes to promote airflow—especially useful for athletes or individuals prone to sweaty feet.
- Apply anti-slip backing for secure placement.
- Decorate with colored fabric, patterns, or fun designs for children's shoes.
- Integrate reflective strips for safety in work boots or running shoes.

- Gently hand-wash fabric-covered insoles in cool water with mild soap. Avoid machine washing to preserve foam integrity.
- Air dry completely before reinserting into shoes.
- Keep the insoles away from direct sunlight or heat sources, which can degrade the foam.
- Use baking soda or a mild disinfectant spray to neutralize odors.
- Replace homemade memory foam insoles every 6–12 months, depending on wear, activity level, and hygiene needs.
- If the insole slides in the shoe, add double-sided tape or apply a layer of anti-slip backing.
- Memory foam flattening after a few weeks? Switch to higher-density foam or reinforce with a gel pad for extended life.
- Edge fraying and loose threads? Secure with fabric glue and trim regularly.
- Unpleasant odor or moisture buildup? Regularly wash insoles and use breathable covering materials.
- Too much bulk in the shoe? Trim the foam for a slimmer profile or select thinner sheets.
- Waterproof memory foam insoles for hiking boots or rain shoes.
- Padded heel and arch support layers for plantar fasciitis relief.
- Fun, personalized colors and patterns for kids' sneakers, boosting comfort and style.
- Reflective safety additions for sports and work environments.
- Embroidered branding or logo for promotional, team, or company shoes.
Manufacturers and OEMs interested in scaling memory foam insole production should consider these advanced strategies:
- Invest in CNC cutting machines for consistent sizing and contouring.
- Source eco-friendly or recycled memory foam for environmentally conscious clients.
- Apply multi-layer construction, combining memory foam with gel or EVA for specialized support.
- Offer customization services for private label brands, wholesalers, or large retailers interested in unique designs and features.
- Test different foam densities and coverings to meet market requirements for orthopedic, athletic, or fashion insoles.
Learning how to make memory foam insoles at home opens the door to real personalized comfort. With the right materials and a little creativity, you can transform any pair of shoes into a source of lasting support and cushioning. Whether outfitting sports shoes, daily wear, or work boots, home-crafted memory foam insoles are cost-effective, reliable, and tailored to your specific needs. Manufacturers and OEMs can also leverage these techniques to deliver premium solutions to their customers worldwide, reinforcing their reputation as industry leaders in footwear innovation.

For general use, a thickness of 5–10mm strikes a balance between cushioning and fit. Adjust thickness for specific needs, such as more padding for sports or thinner options for dress shoes.
It's best to use authentic memory foam, since ordinary foam will not provide the same adaptive support and comfort. Real memory foam molds to your foot shape and recovers fully after use.
Yes, custom-cut memory foam insoles can be tailored to fit all shoe styles. Simply use the existing insole or a foot tracing as your template for precise sizing.
Choose lightweight, breathable cover fabrics, and add ventilation holes to the foam. Mesh and moisture-wicking textiles improve airflow and keep feet dry.
Definitely. Memory foam insoles evenly distribute pressure and absorb shock, making them a popular choice for people with plantar fasciitis, metatarsalgia, or sensitive feet.